ESP32-Cam DIY : Homekit Camera
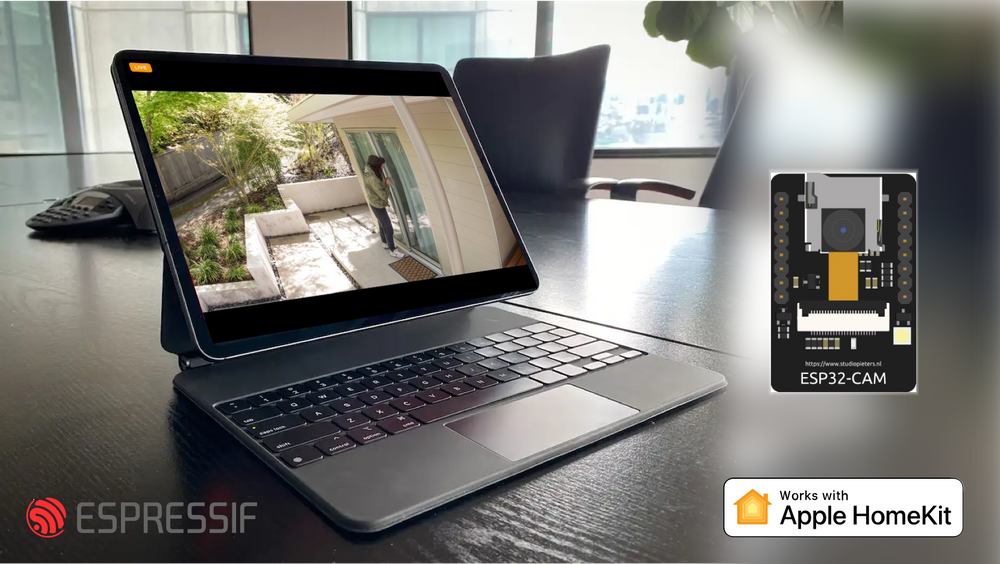
ESP32-CAM 是一片以 ESP32 為基礎的開發版,本身內建 WIFI 及 藍芽 BLE 之外,再加上 OV2640 兩百萬畫素相機模組、 閃光燈模組等。
ESP32-CAM 可以通過圖片或者MJPEG IP Camera的方式來介接至HomeAssistant,再利用Homebridge接入HomeKit,若您想原生接入HomeKit會比較麻煩,Github中有個解決方案,現在這里分享下如何編譯及燒錄。
本文電腦環境為macOS,若您有基本開發知識可以在其他平台編譯、刷寫,但是Apple Home App就無可避免的需要有支援的蘋果系統。
1.首先要準備好ESP-IDF開發環境
2.下載程式碼
git clone https://github.com/maximkulkin/esp32-homekit-camera.git
cd esp32-homekit-camera
更新子模塊
git submodule update --init --recursive
添加CMakeList.txt,參考Issue
3.配置
查看設備的serial阜號,執行此步驟時,可以先不用接線,後面會說明,只需要將TTL模組USB插進電腦即可執行查詢。
ls /dev/tty.*
ex. /dev/tty.usbserial-0001
開始配置
make menuconfig
如果您像我一樣,是使用VSCode + ESP-IDF 的方式建立環境,這邊可能無法順利執行"make menuconfig"。
接下來只需要終端機,暫時拋開VSCode。
進入esp-idf的安裝路徑,若你忘了,可以在VSCode中ESPRESSIF Extension查看:
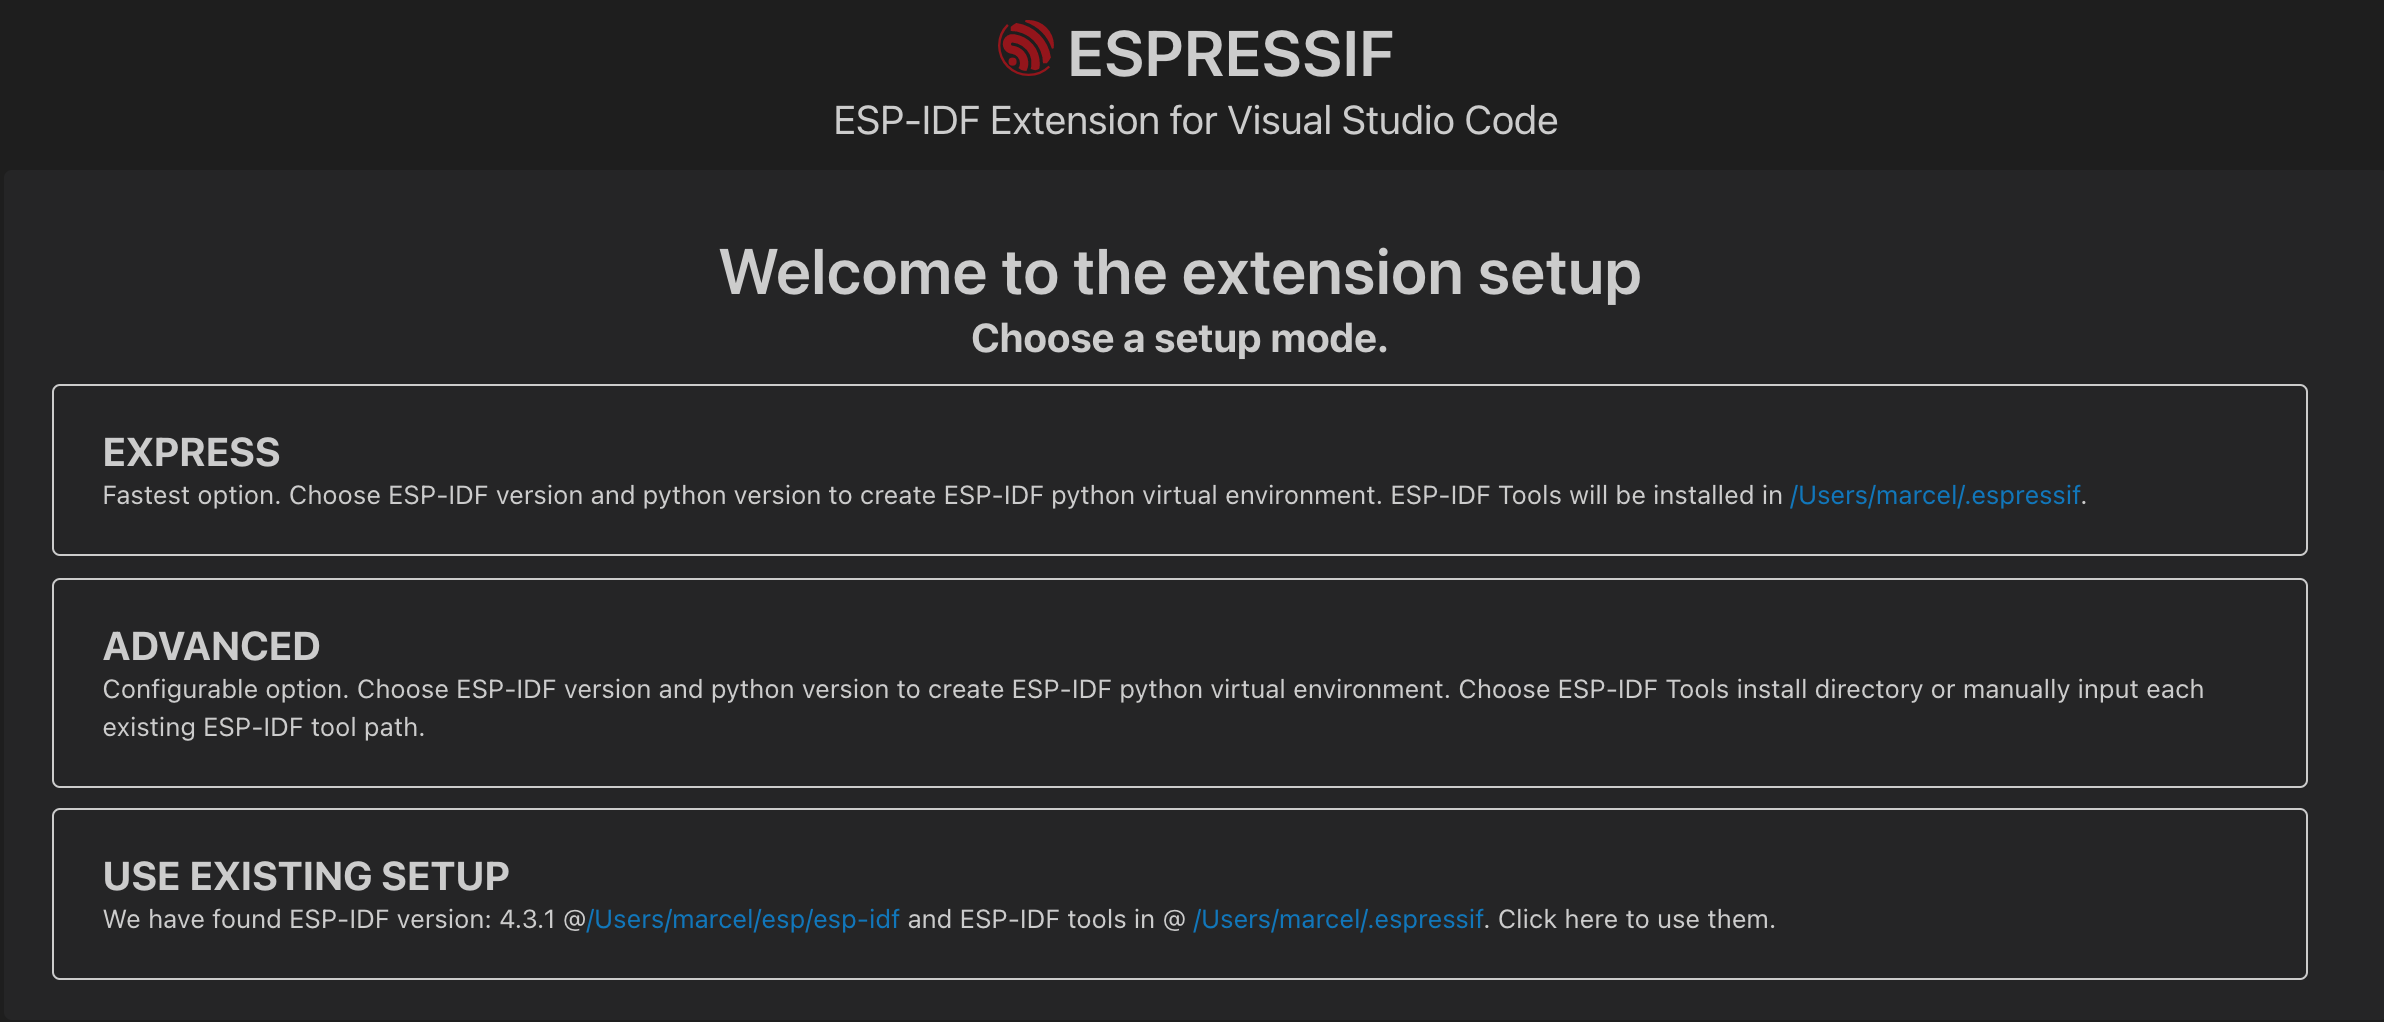
我的路徑是在home下,所以可省略成~/
cd ~/esp/esp-idf
or
cd /{YOUR_PATH}/esp/esp-idf
接著執行
./install.sh
. ./export.sh
再次回到esp32-homekit-camera
cd {YOUR_PATH}/esp32-homekit-camera
打開配置窗
make menuconfig
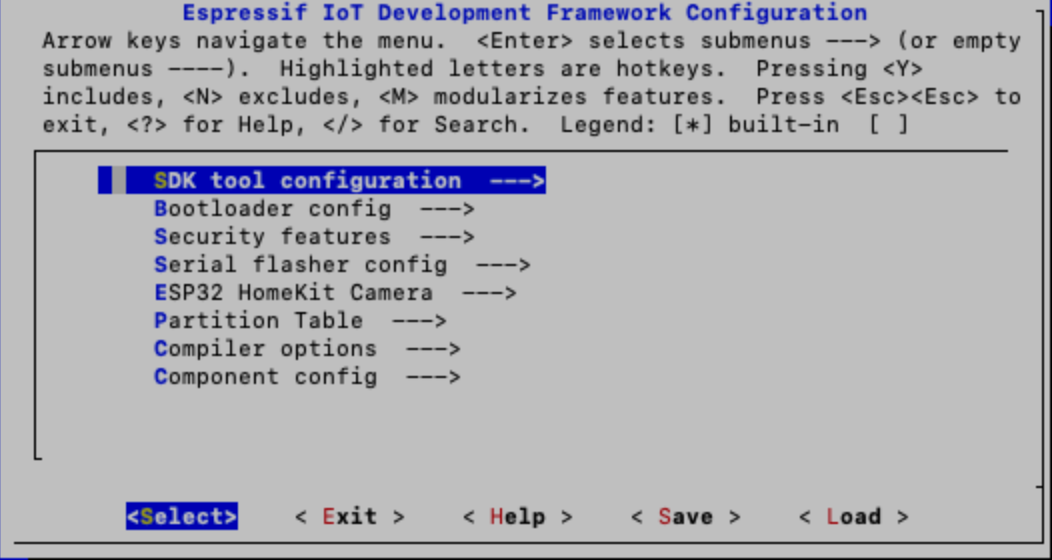
依照下列資訊來配置
- Serial flasher config
- Default serial port
- Flash size = 4 MB
- Partition Table
- Partition Table = Custom partition table CSV
- Custom partition CSV file = partitions.csv
- Component config
- Driver configuration
- RTCIO configuration
- Support array
rtc_gpio_descfor ESP32 = check
- Support array
- RTCIO configuration
- ESP32-specific
- Support for external, SPI-connected RAM = check
- SPI RAM config
- Initialize SPI RAM during startup = check
- SPI RAM access method = Make RAM allocatable using malloc() as well
- Camera configuration
- OV2640 Support = check
- HomeKit
- SPI flash address for storing HomeKit data = 0x3A0000
- Driver configuration
- ESP32 HomeKit Camera
- WiFi SSID
- WiFi Password
- Select Camera Pinout
- Select Camera Pinout = your variant of module
- LED Pin
- PIN = your variant of module
- ESP32-CAM by AI-Thinker == 33
- PIN = your variant of module
- Image sensor vertical flip (optional)
- Toggle if HomeKit app has video feed upside down
- Image sensor horizontal mirror (optional)
- Toggle if HomeKit app has video feed mirrored
- Image sensor enhance settings (optional)
- EXPERIMENTAL: adjusts contrast, saturation, etc for better image quality
- HomeKit Device Setup Code (optional)
- HomeKit Device Manufacturer (optional)
- HomeKit Device model name (optional)
- HomeKit Device model number (optional)
- HomeKit Device Serial number (optional)
- HomeKit Device Firmware version (optional)
4.使用USB轉TTL模組來刷寫
接線:
ESP32-Cam -------- TTL模組工具
TX -------- RX
RX -------- TX
GND -------- GND
3.3V -------- 3.3V (這邊要使用5V也可以)
GPIO0 -------- GND (開發版上電前要接好,上電後會進入刷寫模式)
擦除flash
make erase_flash
開始刷寫
make flash
若沒有編譯過,會自動"make all"編譯。
一陣編譯(會有一些警告)後,會有寫入的百分比進度,直到出現
Hard resetting via RTS pin...
代表刷寫完成了,此時移除掉GPIO0,重新插電(建議電源有2A,並且品質不要太糟糕,若您依然使用模組工具來供電,可能會不穩定)。
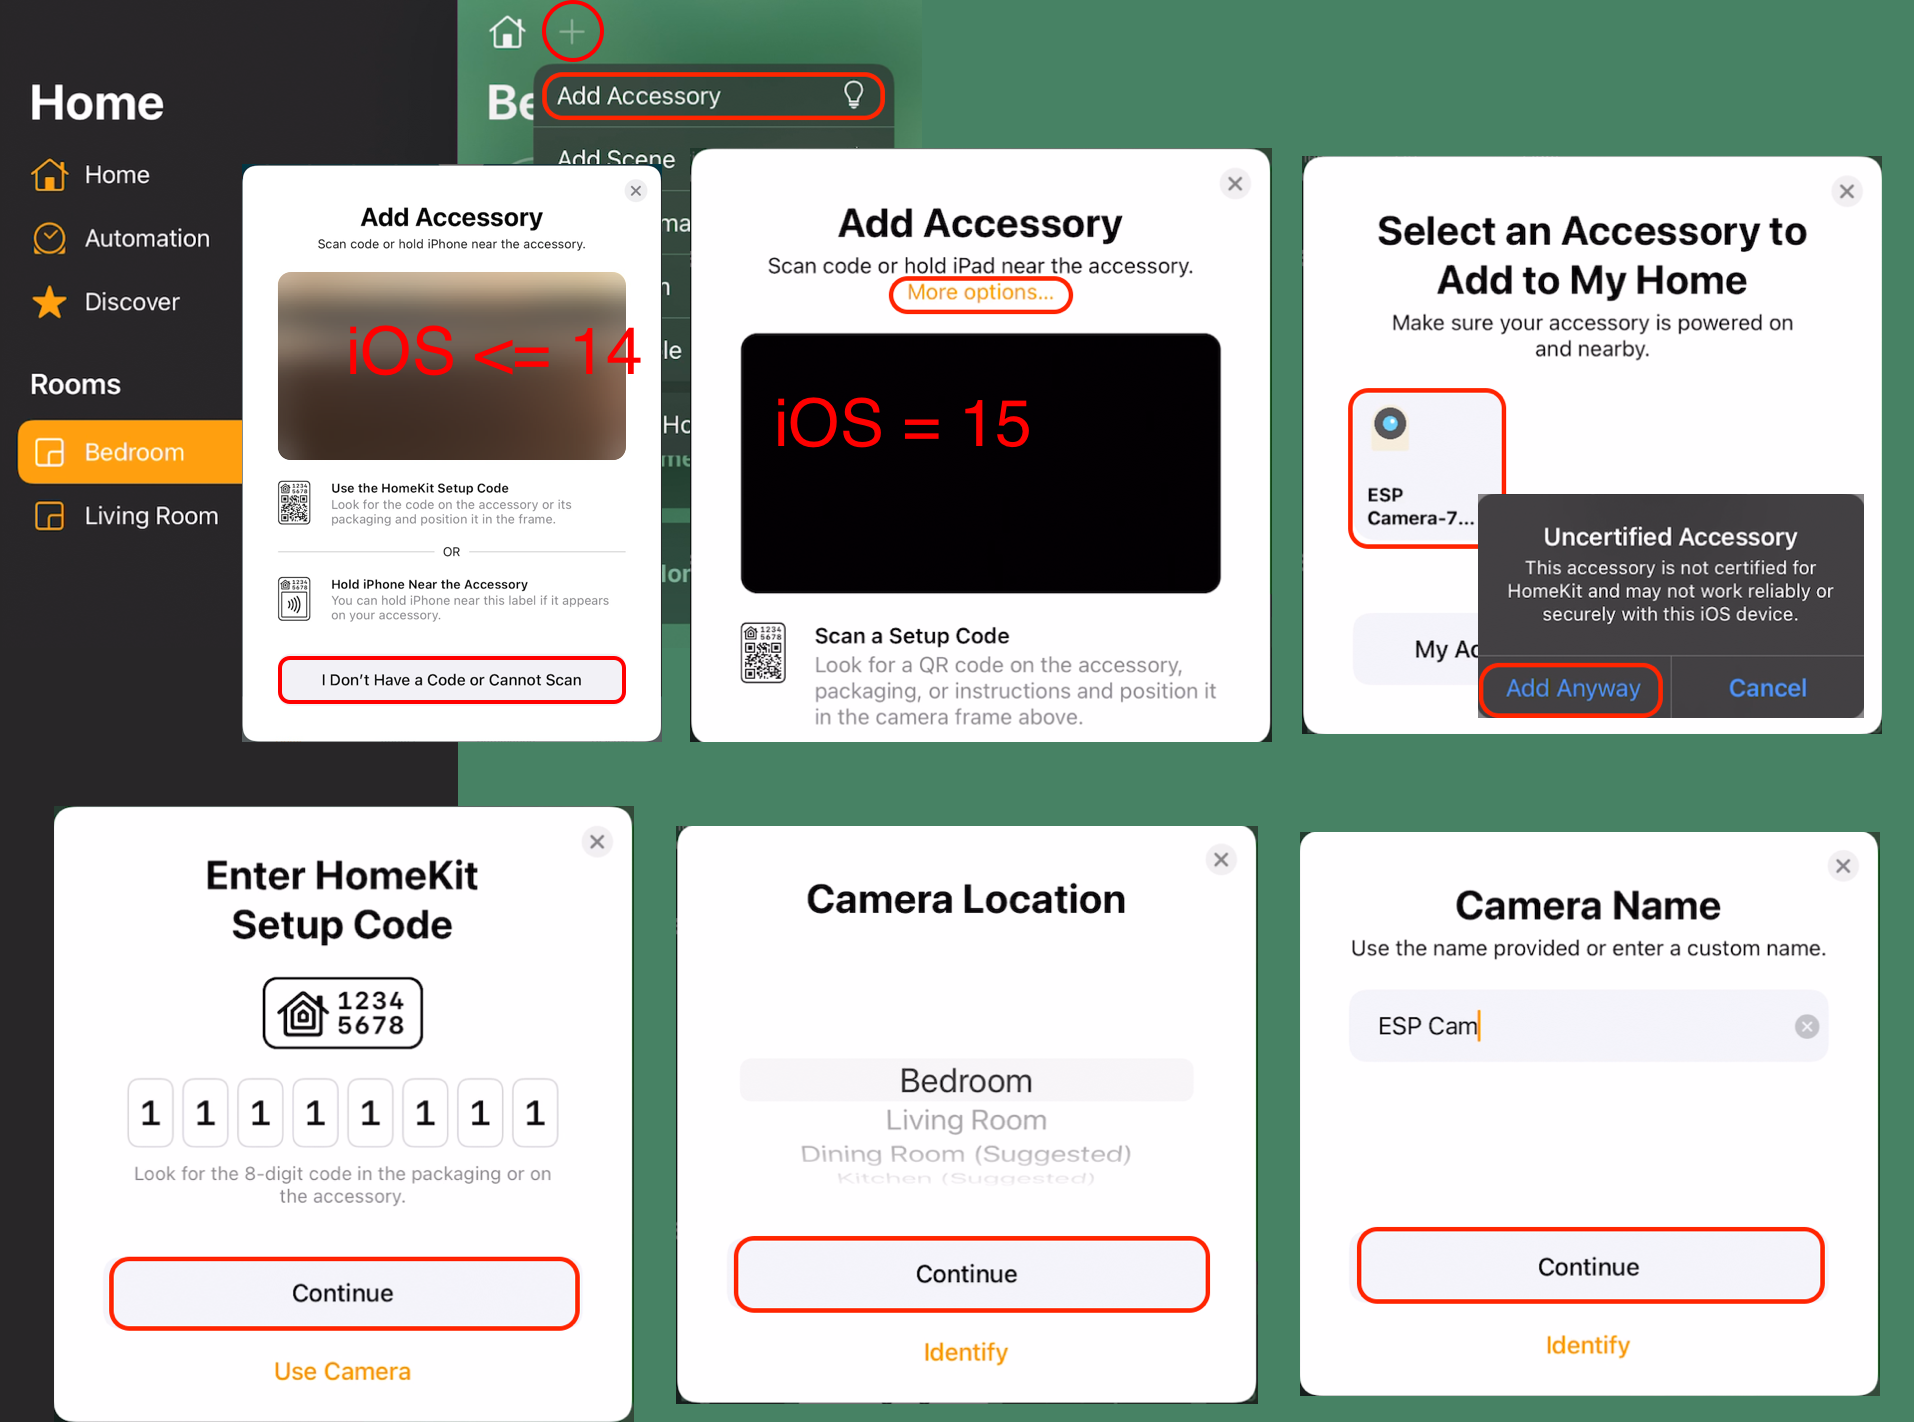
5.HomeApp添加設備
(由上到下,由左至右,看圖操作)
